
How connect a fan to a Raspberry Pi Điện tử ProE
Because an effective heat dissipation solution is really critical for the Raspberry Pi 4, beside placing heatsinks, we advise to use well ventilated cases as our self-made 3D-printed case and / or mounting a fan. In most cases a well designed open enclosure will do the job.

Raspberry Pi 4 Fan Pinout Images and Photos finder
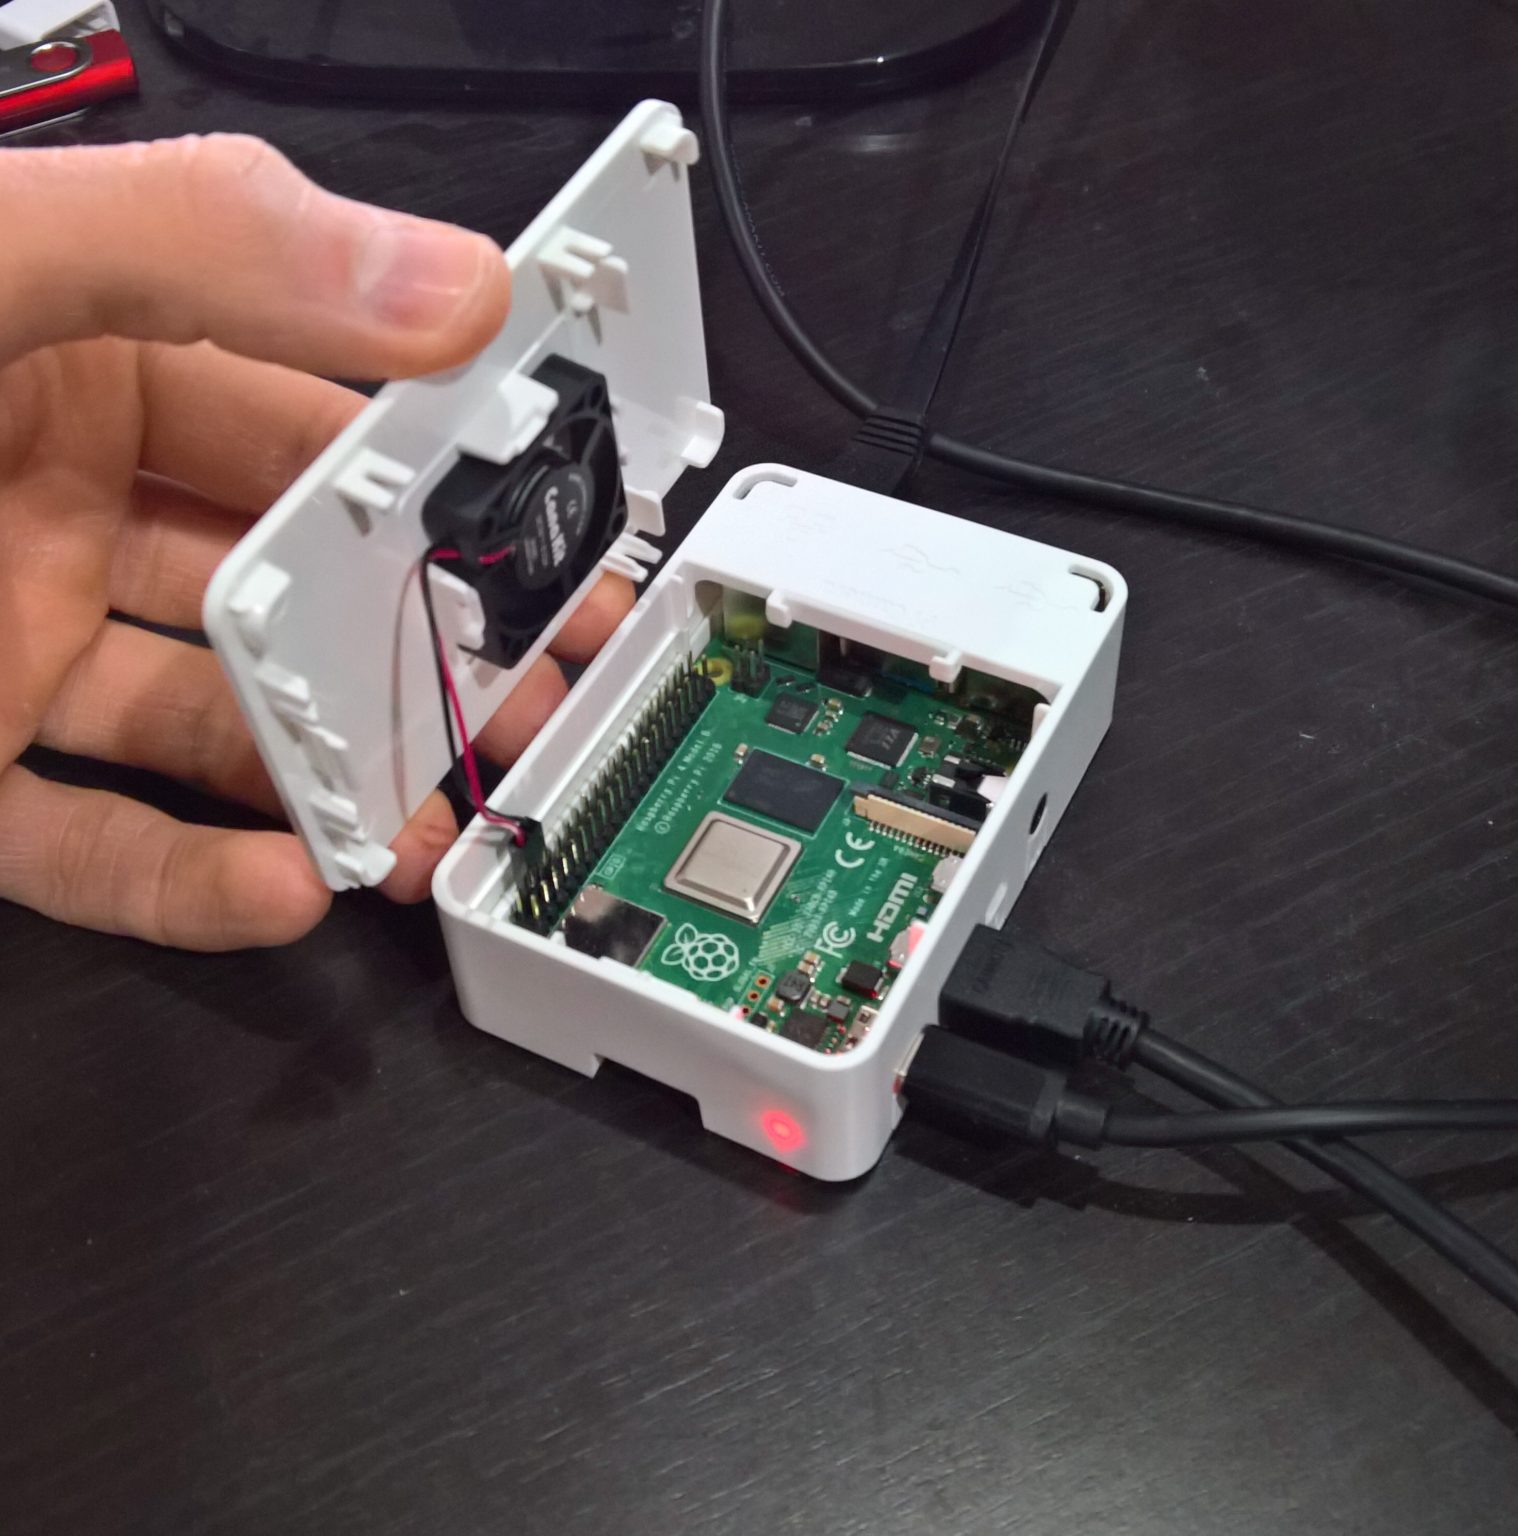
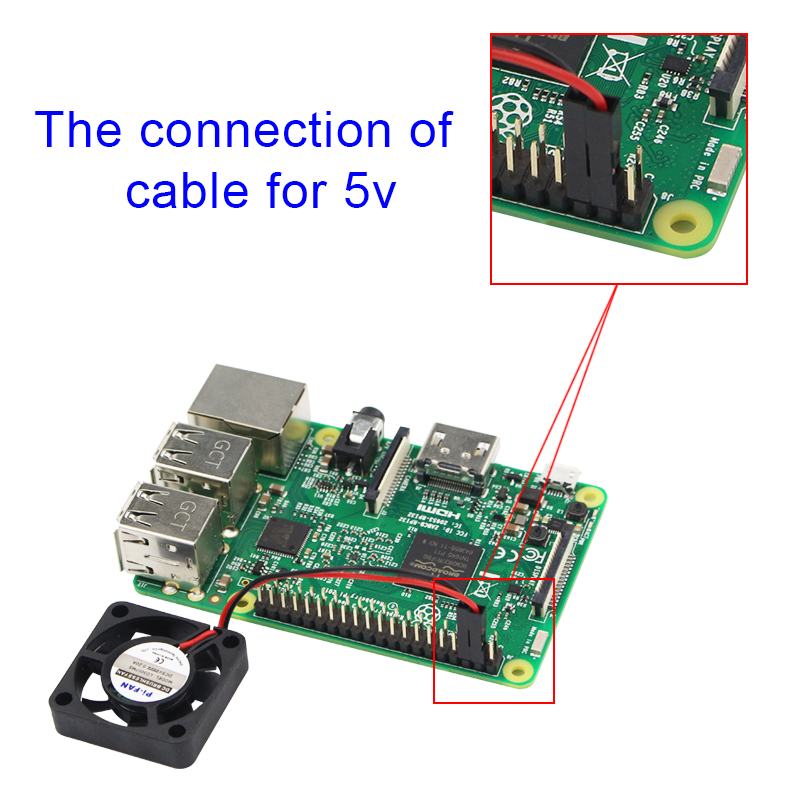
With sandpaper, clear all the burrs from the screw holes from the inside. Take your fan and place it under the case's top and then use screw and nuts and secure your fan on the case. As you put your Raspberry Pi back into its case, you should consider installing it as normal and then connect the red wire from your pan to the 5-volt pin on the.
Raspberry Pi Dual Fan With Heat Sink
Mounting the fan If you have a Raspberry Pi without a case, you won't be able to hold the fan in place. If you have the official case, then you can buy the case fan attachment. Buy it here. Official Raspberry Pi 4 case with fan attachment

How to Add a Raspberry Pi 4 Cooling Fan Howchoo
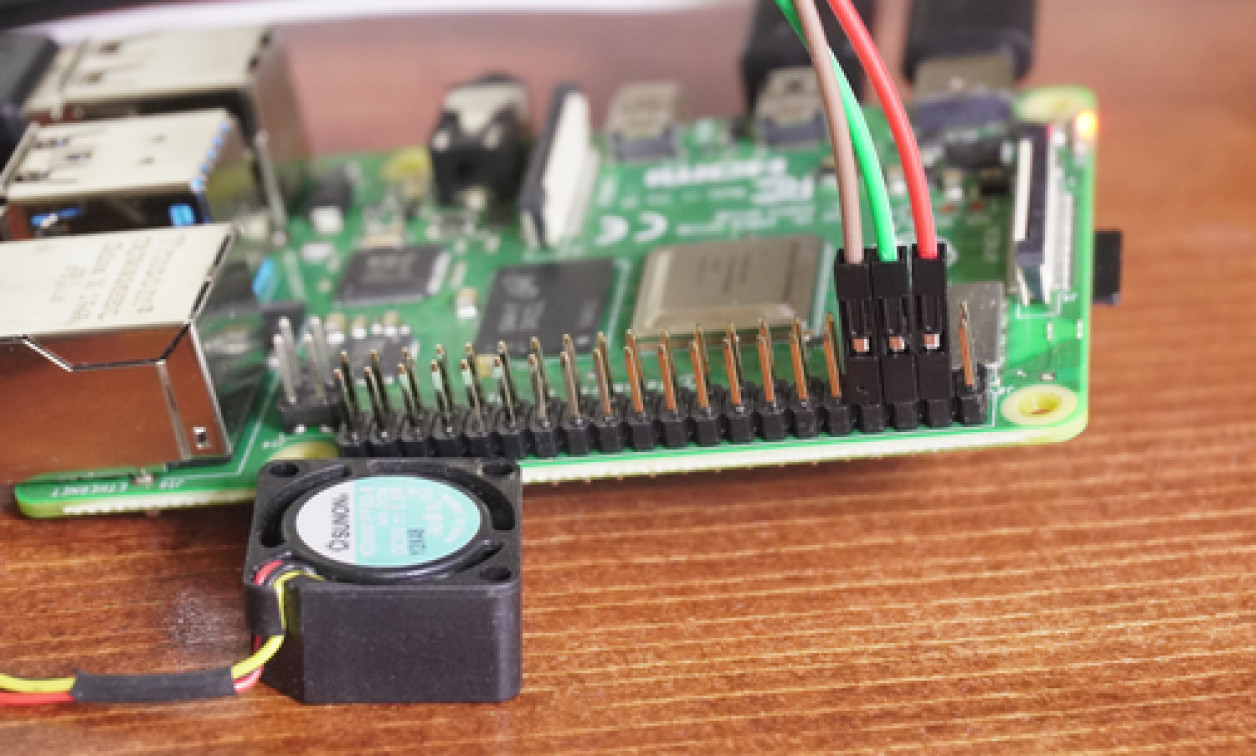
Here's my installation of the EZ Fan 2 connector: Remember to test the fan and microchip before heating the shrink-wrap Notice, green wire is on the top, yellow in the middle and blue at the.
Raspberry Pi 4 4Gb Fan kit 2019 standaard inclusief heatsinks, ventilator en...
Unbox and Setup Raspberry Pi 4 Case Fan in 5 Simple Steps - YouTube © 2024 Google LLC Presenting.. the case fan for the official case of Raspberry Pi 4 Model B! This is an official.
Raspberry Pi 4 Fan Wiring My XXX Hot Girl
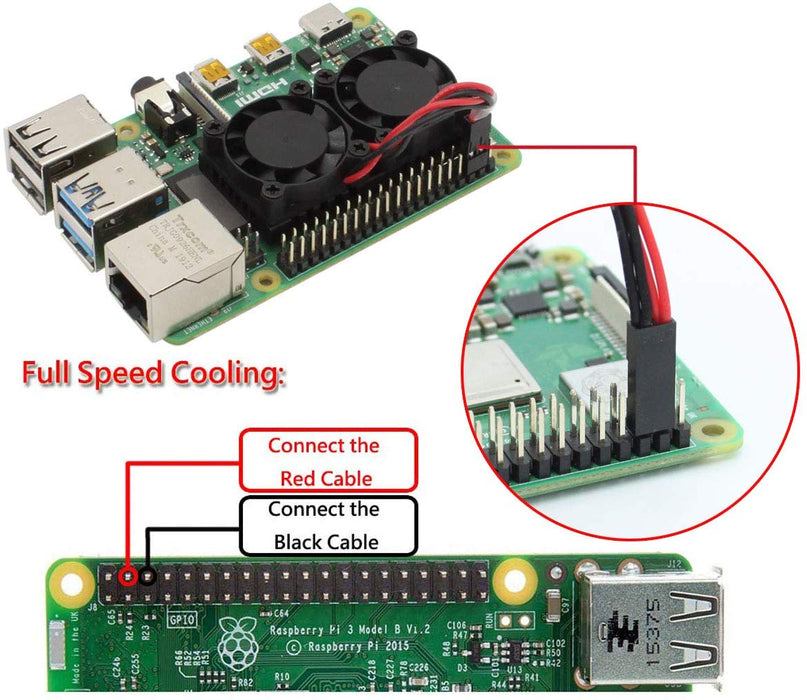
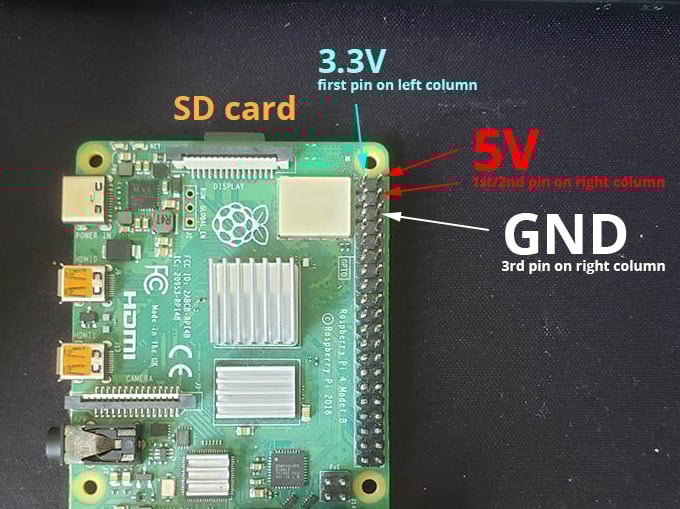
What do you connect the fan to? De Raspberry Pi Boards have a list of GPIO Pins Check out the pins on the picture below You connect the fan to the selected pins in the top left if you want the fan to always be on. (as long as the Raspberry Pi on) The left pin is the 5V and the right is the GND. What if you don't connect a fan?
CanaKit Raspberry Pi 4 Cooling Fan The Tech Journal
Fan software controls To support the hardware, a new Pi OS update released on December 2 that made it easy to configure options for the Fan, like which GPIO port the blue wire is plugged into, or what temperature the Pi should reach before the fan is powered up.
raspberry 4 fan pin raspberry pi 4 pin 023NLN
This is a quick tutorial on how to install a cooling fan to your Raspberry Pi 4. To purchase the Raspberry Pi 4 Cooling Fan Case that you see in this video, click the link b.more.
Raspberry Pi OS Fan Control Embedded Computing Design
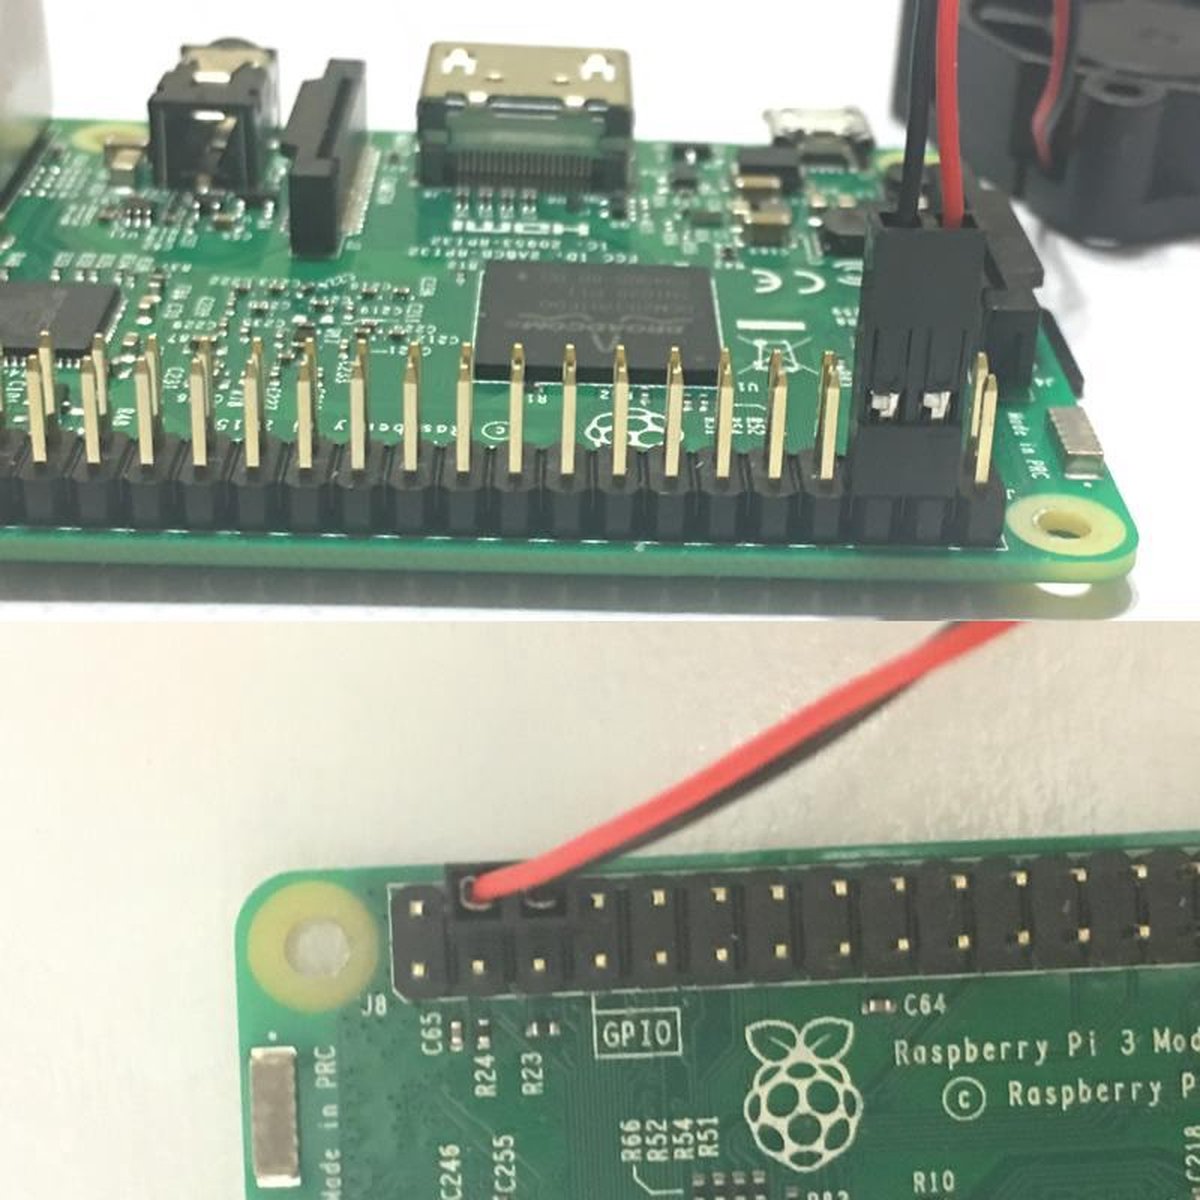
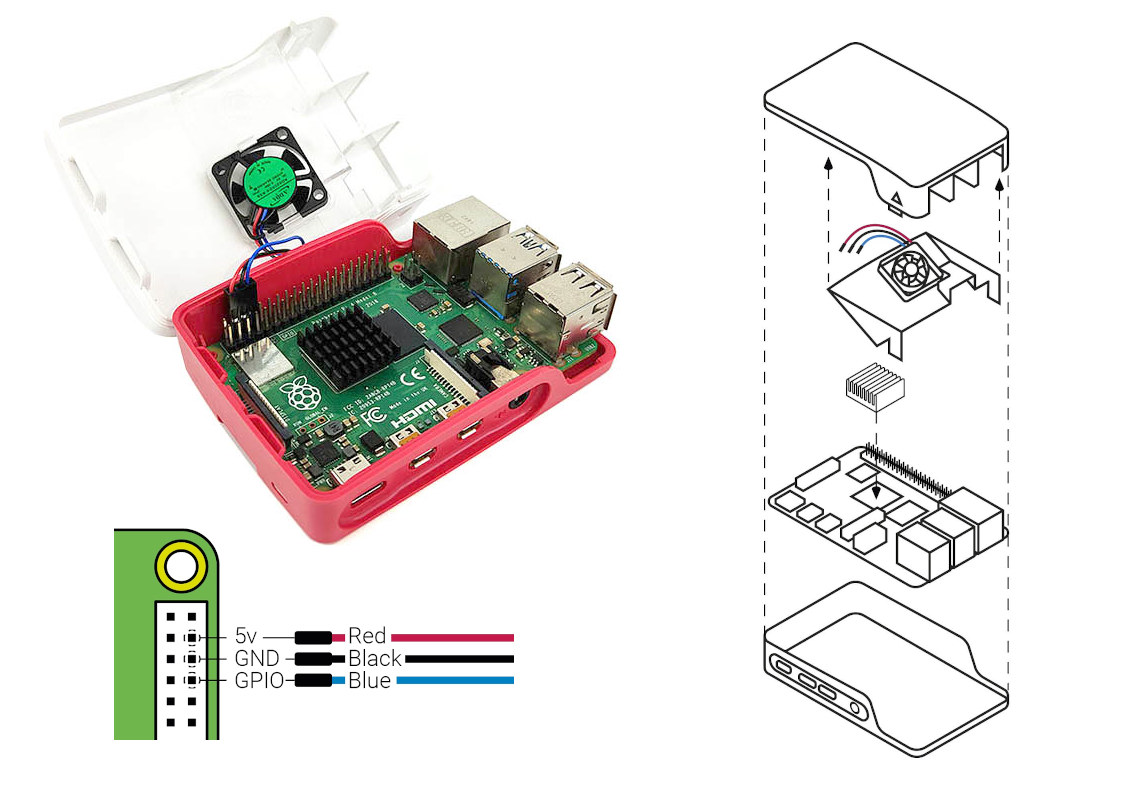
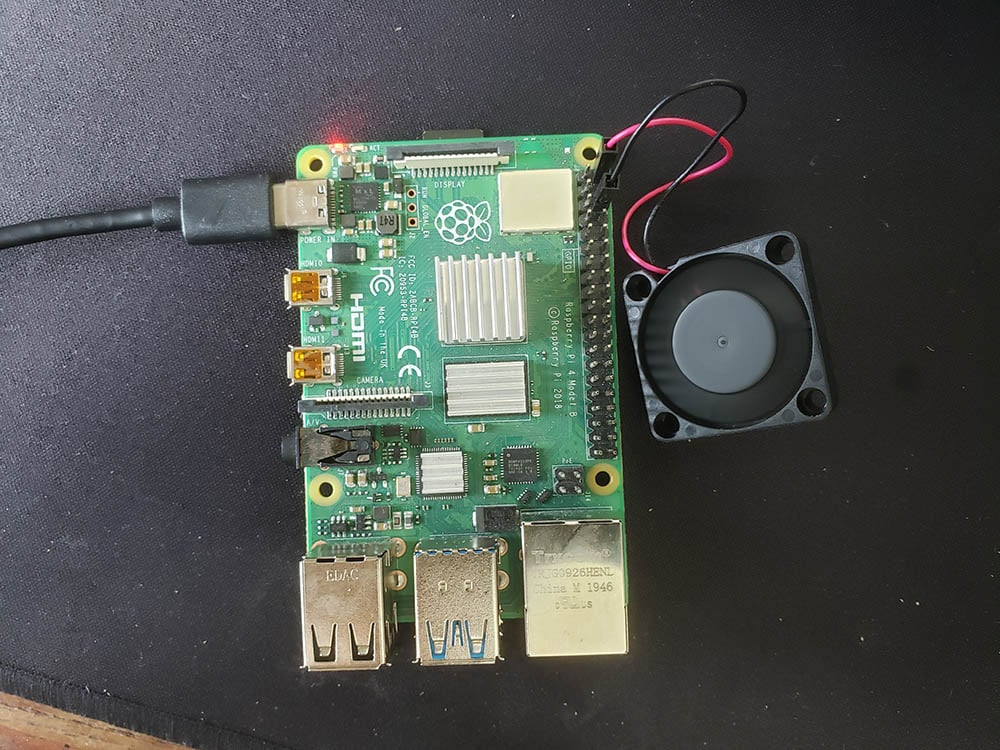
Connect the three leads from the fan to the Raspberry Pi 4's GPIO pins, as shown in the table and diagram below. Take care to connect each lead to the correct pin. Lead 5v Colour GPIO pin Ground GPIO 14 RED 4 BLACK 6 BLUE 8 5 Fit the lid of the case onto the base. 3 1 2 3 4 5 6 D D 7 8 9 10 7 11 12 D
Raspberry Pi Fan Pins (An Easy Cooling Solution) PiCockpit
Tue Jul 13, 2021 1:01 pm So if you fan has the 3rd wire for speed control , note a normal PC fan will have a 3rd wire but it will be a speed output do not connect this to your pi, you will need to enable the fan control. Instructions can be found on the relevant hardware page :- https://www.raspberrypi.org/products/ra. -case-fan/ Using your fan
Official Raspberry Pi 4 case fan adds cooling to Raspberry Pi 4 case
The easiest way to make a hole for the fan is to use a 1 1/8" hole saw, drilling slowly. Put the hole saw on your drill, and either use the lower speed setting, or hold the trigger gently, and apply light pressure drilling while holding the Pi case steady.
New Raspberry Pi 3 B+ CPU Fan Adjustable 5V 3.3V Cooling Fan for Raspberry Pi 3 Model B + Plus
The PI cooling fan on the CanaKit case for the Raspberry Pi 4 can be somewhat loud once installed, however when doing CPU intensive operations, it's a must have to keep your Pi cool. Pi Cooling Fan stats Originally I left the fan unhooked until I was compiling a linux kernel on the Raspberry Pi 4.
diplom päta vyblednúť raspberry pi fun connect Madison vrch Odchod na
Features Fits perfectly into the lid of the Raspberry Pi 4 Case Temperature-controlled fan delivers up to 1.4CFM of air flow over the processor, memory, and power management IC 18mm × 18mm × 10mm heatsink with self-adhesive pad improves heat transfer from the processor Getting started Assembling your fan with your case

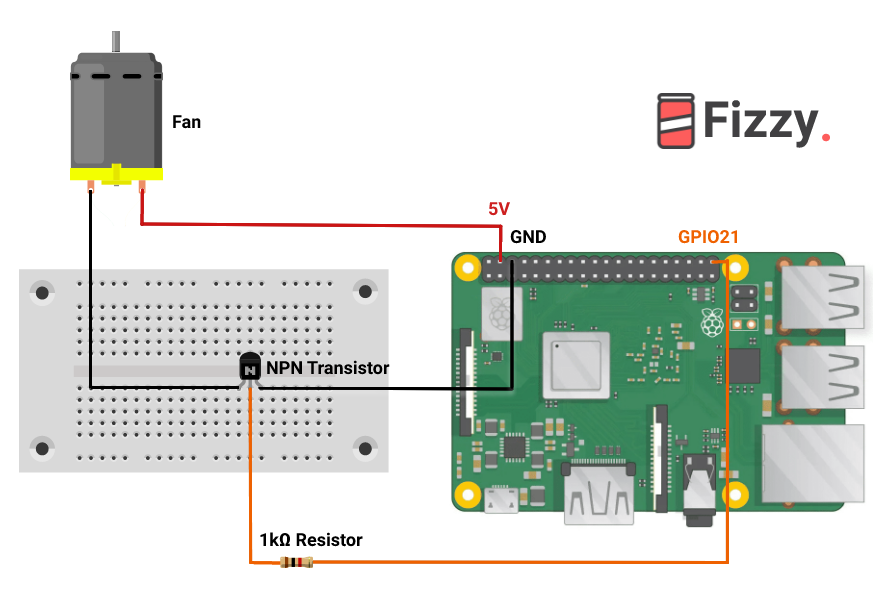
Electrical Wiring/controlling 4 channel relay with Raspberry Pi 2b+ Valuable Tech Notes
Raspberry Pi 4 Case (With Cooling Fan) 1. The laser-cut parts of the case are protected by an adhesive film which needs to be removed before assembly (this is *very* therapeutic), simply peel it off 2. Using the black screws, attach the 4mm stand-offs to the bottom plate of the case 3.

Building a Powerful PC Using Raspberry Pi 4 GEEKY SOUMYA
Step 3: Connect the Fan to the Raspberry Pi. Now that you have identified the wiring of your case fan, it's time to connect it to your Raspberry Pi. The process may vary depending on whether you're using jumper wires or soldering the fan directly. Follow these steps for your preferred method:

Raspberry Pi Fan Not Working Raspberry
My Raspberry Pi 4 Labists kit does not include any instructions on where to connect the power wires for the cooling fan. There is a video on the Labists website that shows how to assemble the kit, but the two fan power wires in that video are combined in a single connector. My kit has to separate connectors (one for each wire).